Now you can enter a desired mobile number and a text message to be sent on that number. Finally click on  Send SMS  button to send your SMS....

send sms

02:20 0 Comments

Now you can enter a desired mobile number and a text message to be sent on that number. Finally click on Send SMS button to send your SMS. Make sure your GSM/CDMA connection is working fine to deliver your SMS to its recipient.
You can take a number of SMS separated by comma and then inside your program you will have to parse them into an array string and finally you can use a loop to send message to all the given numbers. That's how you can write your own SMS client. Next section will show you how to use existing SMS client to send SMS.

Using Built-in Intent to send SMS

You can use Android Intent to send SMS by calling built-in SMS functionality of the Android. Following section explains different parts of our Intent object required to send an SMS.

Intent Object - Action to send SMS

You will use ACTION_VIEW action to launch an SMS client installed on your Android device. Following is simple syntax to create an intent with ACTION_VIEW action.
Intent smsIntent = new Intent(Intent.ACTION_VIEW);

Intent Object - Data/Type to send SMS

To send an SMS you need to specify smsto: as URI using setData() method and data type will be to vnd.android-dir/mms-sms using setType() method as follows −
smsIntent.setData(Uri.parse("smsto:"));
smsIntent.setType("vnd.android-dir/mms-sms");

Intent Object - Extra to send SMS

Android has built-in support to add phone number and text message to send an SMS as follows 
smsIntent.putExtra("address"  , new String("0123456789;3393993300"));
smsIntent.putExtra("sms_body"  , "Test SMS to Angilla");

Example

Following example shows you in practical how to use Intent object to launch SMS client to send an SMS to the given recipients.
To experiment with this example, you will need actual Mobile device equipped with latest Android OS, otherwise you will have to struggle with emulator which may not work.
StepDescription
1You will use Android studio IDE to create an Android application and name it as tutorialspoint under a package com.neo.istone.send.sms
2Modify src/MainActivity.java file and add required code to take care of sending SMS.
3Modify layout XML file res/layout/activity_main.xml add any GUI component if required. I'm adding a simple button to launch SMS Client.
4No need to define default constants.Android studio takes care of default constants.
5Modify AndroidManifest.xml as shown below
6Run the application to launch Android emulator and verify the result of the changes done in the application.
Following is the content of the modified main activity file src/com.neo.istone.send.sms/MainActivity.java.

MainActivity.java

package com.neo-istone.send.sms;

import android.net.Uri;
import android.os.Bundle;
import android.app.Activity;
import android.content.Intent;
import android.util.Log;
import android.view.Menu;
import android.view.View;
import android.widget.Button;
import android.widget.Toast;

public class MainActivity extends Activity {
   @Override
   protected void onCreate(Bundle savedInstanceState) {
      super.onCreate(savedInstanceState);
      setContentView(R.layout.activity_main);

      Button startBtn = (Button) findViewById(R.id.button);
      startBtn.setOnClickListener(new View.OnClickListener() {
         public void onClick(View view) {
            sendSMS();
         }
      });
   }
   
   protected void sendSMS() {
      Log.i("Send SMS", "");
      Intent smsIntent = new Intent(Intent.ACTION_VIEW);
      
      smsIntent.setData(Uri.parse("smsto:"));
      smsIntent.setType("vnd.android-dir/mms-sms");
      smsIntent.putExtra("address"  , new String ("01234"));
      smsIntent.putExtra("sms_body"  , "Test ");
      
      try {
         startActivity(smsIntent);
         finish();
         Log.i("Finished sending SMS...", "");
      } catch (android.content.ActivityNotFoundException ex) {
         Toast.makeText(MainActivity.this, 
         "SMS faild, please try again later.", Toast.LENGTH_SHORT).show();
      }
   }
}
Following will be the content of res/layout/activity_main.xml file −
   xmlns:tools="http://schemas.android.com/tools"
   android:layout_width="match_parent"
   android:layout_height="match_parent" 
   android:paddingLeft="@dimen/activity_horizontal_margin"
   android:paddingRight="@dimen/activity_horizontal_margin"
   android:paddingTop="@dimen/activity_vertical_margin"
   android:paddingBottom="@dimen/activity_vertical_margin" 
   tools:context=".MainActivity">
   
   
      android:layout_width="wrap_content"
      android:layout_height="wrap_content"
      android:text="Drag and Drop Example"
      android:id="@+id/textView"
      android:layout_alignParentTop="true"
      android:layout_centerHorizontal="true"
      android:textSize="30dp" />
      
   
      android:layout_width="wrap_content"
      android:layout_height="wrap_content"
      android:text="Tutorials Point "
      android:id="@+id/textView2"
      android:layout_below="@+id/textView"
      android:layout_centerHorizontal="true"
      android:textSize="30dp"
      android:textColor="#ff14be3c" />
      
   
      android:layout_width="wrap_content"
      android:layout_height="wrap_content"
      android:id="@+id/imageView"
      android:src="@drawable/abc"
      android:layout_marginTop="48dp"
      android:layout_below="@+id/textView2"
      android:layout_centerHorizontal="true" />
   
      android:layout_width="wrap_content"
      android:layout_height="wrap_content"
      android:text="Compose SMS"
      android:id="@+id/button"
      android:layout_below="@+id/imageView"
      android:layout_alignRight="@+id/textView2"
      android:layout_alignEnd="@+id/textView2"
      android:layout_marginTop="54dp"
      android:layout_alignLeft="@+id/imageView"
      android:layout_alignStart="@+id/imageView" />   

Following will be the content of res/values/strings.xml to define two new constants 
   tutorialspoint
Following is the default content of AndroidManifest.xml 
   package="com.example.tutorialspoint" >
      
   
      android:allowBackup="true"
      android:icon="@drawable/ic_launcher"
      android:label="@string/app_name"
      android:theme="@style/AppTheme" >
      
     
         android:name="com.example.tutorialspoint.MainActivity"
         android:label="@string/app_name" >


Eclipse Run Icon icon from the toolbar. Before starting your application, Android studio will display following window to select an option where you want to run your Android application.
Android Mobile Device


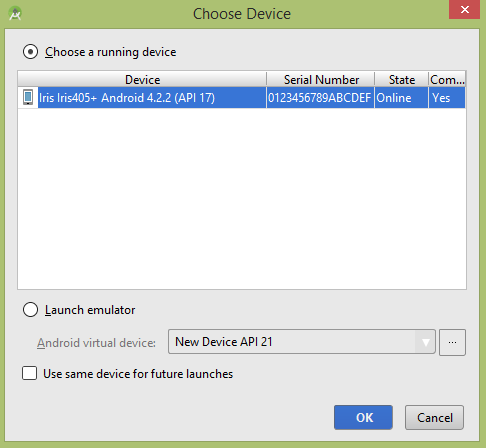
You can modify either of the given default fields and finally use send SMS button to send your SMS to the mentioned recipient.


0 Comments:

AutoCompleteTextView, subclass of EditText with Auto-complete function AutoCompleteTextView  is a subclass of EditText that shows completion...

Autotextcomple exmple

22:04 0 Comments

AutoCompleteTextView, subclass of EditText with Auto-complete function

AutoCompleteTextView is a subclass of EditText that shows completion suggestions automatically while the user is typing.


To implement AutoCompleteTextView in your app:

Add the AutoCwompleteTextView to your layout: main.xml
<LinearLayout xmlns:android="http://schemas.android.com/apk/res/android"
xmlns:tools="http://schemas.android.com/tools"
android:layout_width="match_parent"
android:layout_height="match_parent"
android:orientation="vertical"
tools:context=".MainActivity" >

<TextView
android:layout_width="match_parent"
android:layout_height="wrap_content"
android:text="Select your favourite actor:"/>

<AutoCompleteTextView
android:id="@+id/autoText"
android:layout_width="match_parent"
android:layout_height="wrap_content"/>
<TextView
android:id="@+id/dinamicText"
android:textSize="40sp"
android:textStyle="italic"
android:textColor="#FF8000"
android:gravity="center"
android:layout_width="match_parent"
android:layout_height="wrap_content"
android:text=""/>
</LinearLayout>


Set adapter using the main.java
package neo.app.istone.app_store;

import android.app.Activity;
import android.content.Context;
import android.os.Bundle;
import android.view.TextureView;
import android.view.View;
import android.widget.AdapterView;
import android.widget.ArrayAdapter;
import android.widget.AutoCompleteTextView;
import android.widget.AdapterView.OnItemClickListener;
import android.widget.TextView;
import android.widget.Toast;

public class MainActivity extends Activity {
private final Context context = this;
private AutoCompleteTextView favActor;
private TextView printedText;
private String selectedActor;
private ArrayAdapter<String> actorAdapter;

private static final String[] ACTORS = new String[] {
"Manikantasripadi", "Rajgopla", "swathi", "B.Radha Atha",
"banala.krishnama chary", "sarithakka"};

@Override
protected void onCreate(Bundle savedInstanceState) {
super.onCreate(savedInstanceState);
setContentView(R.layout.main);
printedText = (TextView) findViewById(R.id.dinamicText);
favActor = (AutoCompleteTextView)findViewById(R.id.autoText);
loadData();
favActor.setOnItemClickListener(new OnItemClickListener() {

@Override
public void onItemClick(AdapterView<?> parent, View view,
int position, long id) {
selectedActor = (String) parent.getItemAtPosition(position);
printedText.setText(selectedActor);
}
});
}

private void loadData() {
actorAdapter = new ArrayAdapter<String>(this,
android.R.layout.simple_dropdown_item_1line, ACTORS);
favActor.setAdapter(actorAdapter);
favActor.setThreshold(1);

}
}


0 Comments:

FFireBase Notifiction firebase notifiction:  sing Firebase Cloud Messaging you can send three types of messages i.e  Notification Message ,...

Android Push Notifications using Firebase Cloud Messaging

09:15 0 Comments

FFireBase Notifiction

firebase notifiction: sing Firebase Cloud Messaging you can send three types of messages i.e Notification MessageData Message and message with both Notification & Data Payload.


DOWNLOAD CODE


Let go start :


Add the Dependencies


Add FIREBASE nofiction dependencies

implementation 'com.google.firebase:firebase-messaging:11.8.0'


Updating the Android Manifest

<manifest xmlns:android="http://schemas.android.com/apk/res/android"
     package="com.main.projects.neo_istone.phone.neo_istone">

     <uses-permission android:name="android.permission.INTERNET"/>
   <application 
        android:allowBackup="true"
        android:icon="@mipmap/app_icon"
        android:label="@string/app_name"
        android:roundIcon="@mipmap/app_icon_round"
        android:supportsRtl="true" 
        android:theme="@style/AppTheme">

   <activity android:name=".MainActivity">
       <intent-filter>
          <action 
             android:name="android.intent.action.MAIN"/>
          <category 
             android:name="android.intent.category.LAUNCHER"/>
         </intent-filter>
       </activity>
       <service android:name=".MessagingService">
       <intent-filter>
       <action android:name="com.google.firebase.MESSAGING_EVENT"/>
       </intent-filter>
       </service>
       <meta-data 
            android:name="com.google.firebase.messaging.default_notification_icon" 
            android:resource="@drawable/app_icon_round"/>
       <meta-data 
            android:name="com.google.firebase.messaging.defult_notification_color" 
            android:resource="@color/colorAccent"/>
</application>
</manifest>

Creata java class MessagingService.class

Messaging.java


package com.main.projects.neo_istone.phone.neo_istone;

import android.app.Notification;
import android.app.NotificationManager;
import android.app.PendingIntent;
import android.content.Intent;
import android.net.Uri;
import android.support.v4.app.NotificationCompat;

import com.google.firebase.messaging.FirebaseMessagingService;
import com.google.firebase.messaging.RemoteMessage;

import java.net.URI;

public class MessagingService extends FirebaseMessagingService {

    @Override
    public void onMessageReceived(RemoteMessage remoteMessage ){
        final Uri uri = null;
       showNotification(remoteMessage.getNotification().getBody(),uri.toString());
    }
    public void showNotification(String message,String uri) {
        Intent intent = new Intent();
        intent.putExtra("url",uri);
        startActivity(intent);
        PendingIntent pi = PendingIntent.getActivity(this, 0,
                new Intent(this, MainActivity.class), 0);
        Notification notification = new NotificationCompat.Builder(this)
                .setSmallIcon(R.drawable.app_icon_round)
                .setContentTitle("Neo-istone-code")
                .setContentText(message)
                .setContentIntent(pi)
                .setAutoCancel(true)
                .build();

        NotificationManager notificationManager = (NotificationManager) getSystemService(NOTIFICATION_SERVICE);
        notificationManager.notify(0, notification);
    }
}

0 Comments:

View source code any website very simple example application devlopered by edu porpers   Example video :- Download App                      ...

View source code any website

View source code any website very simple example application devlopered by edu porpers

  Example video :-


Download App                                                                                              Download code


Let go start 


Creating the User Interface

To start, we are going to create the user interface of our Torch view sroce Application  the Android device..


<?xml version="1.0" encoding="utf-8"?>
<LinearLayout xmlns:android="http://schemas.android.com/apk/res/android"
    android:layout_width="match_parent"
    android:layout_height="match_parent"
    android:orientation="vertical">

    <LinearLayout
        android:layout_width="match_parent"
        android:layout_height="wrap_content"
        android:orientation="horizontal"
        android:background="#a3c539">
        <EditText
            android:id="@+id/et1"
            android:layout_width="wrap_content"
            android:layout_height="wrap_content"
            android:hint="Enter your url"
            android:textSize="14sp"
            android:padding="8dp"
            android:textColor="#fff"
            android:textStyle="bold"
            android:textColorHint="#fff"
            android:layout_weight="1"
            android:background="@android:color/transparent"/>
        <ImageView
            android:onClick="done"
            android:layout_width="wrap_content"
            android:layout_height="match_parent"
            android:src="@drawable/ic_arrow_forward_black_24dp"
            android:scaleType="fitCenter"/>
    </LinearLayout>
    <WebView
        android:layout_width="match_parent"
        android:layout_height="match_parent"
        android:id="@+id/webview">
    </WebView>
</LinearLayout>


Updating the Android Manifest

<uses-permission android:name="android.permission.INTERNET"/>


MainActivity.java

package neo.com.viewsourcecode;

import android.graphics.Bitmap;
import android.support.v7.app.AppCompatActivity;
import android.os.Bundle;
import android.view.View;
import android.webkit.WebView;
import android.webkit.WebViewClient;
import android.widget.EditText;

public class MainActivity extends AppCompatActivity {

    private WebView webview;
    private EditText et1;

    @Override
    protected void onCreate(Bundle savedInstanceState) {
        super.onCreate(savedInstanceState);
        setContentView(R.layout.activity_main);

        webview = findViewById(R.id.webview);
        et1 = findViewById(R.id.et1);
        webview.getSettings().setJavaScriptEnabled(true);
        webview.getSettings().setDisplayZoomControls(true);
        webview.getSettings().setSupportZoom(true);
        webview.setWebViewClient( new WebViewClient(){
            @Override
            public void onPageStarted(WebView param1, String param2, Bitmap param3){
                final String Url= param2;

            }
            @Override
            public void onPageFinished(WebView param1, String param2){
                final String Url= param2;

            }
        });

    }

    public void done(View view) {
      if(et1.getText().toString().equals("https://") && et1.getText().toString().equals("https://")){
          webview.loadUrl("view-source"+et1.getText().toString());
      } else {
          webview.loadUrl("view-source:https://"+et1.getText().toString());
      }
    }
}

                            Devloped by manikantasripadi

IN SKETHWARE

I cant explain sorry see this video skectchware usere


video:


Devloped by manikantasripadi


0 Comments: